Some Lagniappe for You
by Tiny Ruisch
la·gniappe (lnyp, ln-yp)
n. Chiefly Southern Louisiana & Mississippi
1. A small gift presented by a store owner to a customer with the customer’s purchase.
2. An extra or unexpected gift or benefit. Also called regionally boot.
File Transfer Protocol (FTP) is the standard network protocol used for the transfer of computer files between a client and a server on a computer network. As the name suggests, FTP is used to exchange files between computer accounts, transfer files between an account and a desktop computer, or access online software archives. I use FTP whenever I update websites that I maintain.
Years ago, transferring files via FTP could sometimes get complicated. It was usually done with the command line, which required a lot of typing, hopefully without typos. Like many other things, there have been advances in computer software. Most people use FTP client software. As the Wikipedia chart shows, there are many clients you can use.
Over the years, I have tried several of the free or open source programs. For the last year or so, I’ve exclusively used CoreFTP Lite. I have found the program to be fast, easy to use and reliable. The feature list is pretty standard: HIPAA compliance, SFTP/ SSH, SSL/ TLS, FTP/ HTTP/ SOCKS proxy, IDN, drag ‘n drop, site manager, session manager, queue manager, custom screens, bandwidth control, caching, auto-transfer, retry/resume, auto-reconnect options, auto S/key, remote file-searching, advanced directory listings, start/stop/resume of transfers, full recursive chmod, browser integration, site to site transfers, file viewing and editing, firewall support, custom commands, FTP URL parsing, command line transfers, filters and more.
Although the different protocols might seem intimidating, most users will not need all of the features. The default setting will probably work just fine. I use it mostly for uploading files to the websites that I manage (mostly the club website). Core also has a Micro FTP server you can download and install for PC to PC transfers. I haven’t used this so cannot comment on its proficiency.
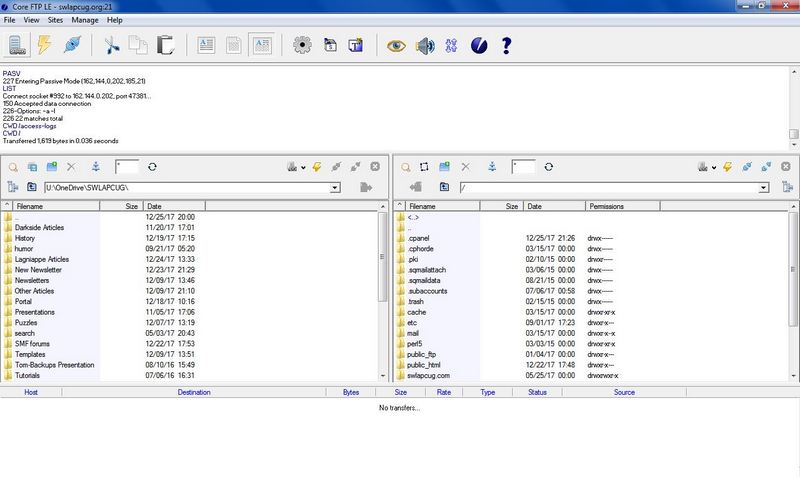
Using the program couldn’t be simpler. There are four panes in the interface. The upper pane tells you connection status. The left is a file list on your local computer. The right pane a file list of the server you are connected to. Finally, the lower pane is the upload/download status when you are transferring files. To manipulate files, you can simply mouse over the icons and view the popup menus. Personally, I find it easier to right click on files and select an action.
Core FTP Lite is free for personal use. There is also a professional version with more features. If you use FTP, give the program a try. You can download it from the Core FTP website.
If you like the program, just tell everyone that you’ve got a SWLAPCUG extra, a bonus perk, a small gift, a present from the club: a little lagniappe.